THE MAKER'S NOTEBOOK · IMAGE PREPARATION
From 100 mm
to the right PNG.
Give your laser software a photo with the size and dot pattern you intended. Start with millimetres, prepare the pixels, then check the import.
A 100 mm square at 300 DPI is 1181 × 1181 pixels. Set width and DPI before exporting, then confirm the physical size in your laser software. 300 DPI is an arithmetic example; choose your machine's resolution with a material test.
Prepare a photo →1. Start with the size of the object
A coaster needs a different crop from a wide sign. Decide the usable width in millimetres before choosing your image resolution. For each side:
pixels = round(mm ÷ 25.4 × DPI)
For a square, use the same width and height. For a rectangle, calculate each side separately. These examples all use 300 DPI:
| Width | Pixel width |
|---|---|
| 100 mm | 1181 px |
| 150 mm | 1772 px |
| 200 mm | 2362 px |
The appropriate DPI depends on the laser, focus and material. Increasing pixels cannot recover detail missing from your source photo. LightBurn relates DPI to line interval and recommends a test to find a suitable interval; see its official image settings.
2. Keep the subject readable at the final size
Crop first. Leave room around faces, ears and other important details; remove distracting edges. Adjust the tones while comparing the original photo and prepared pixels. A dramatic full-screen preview can hide detail that disappears on a small object.
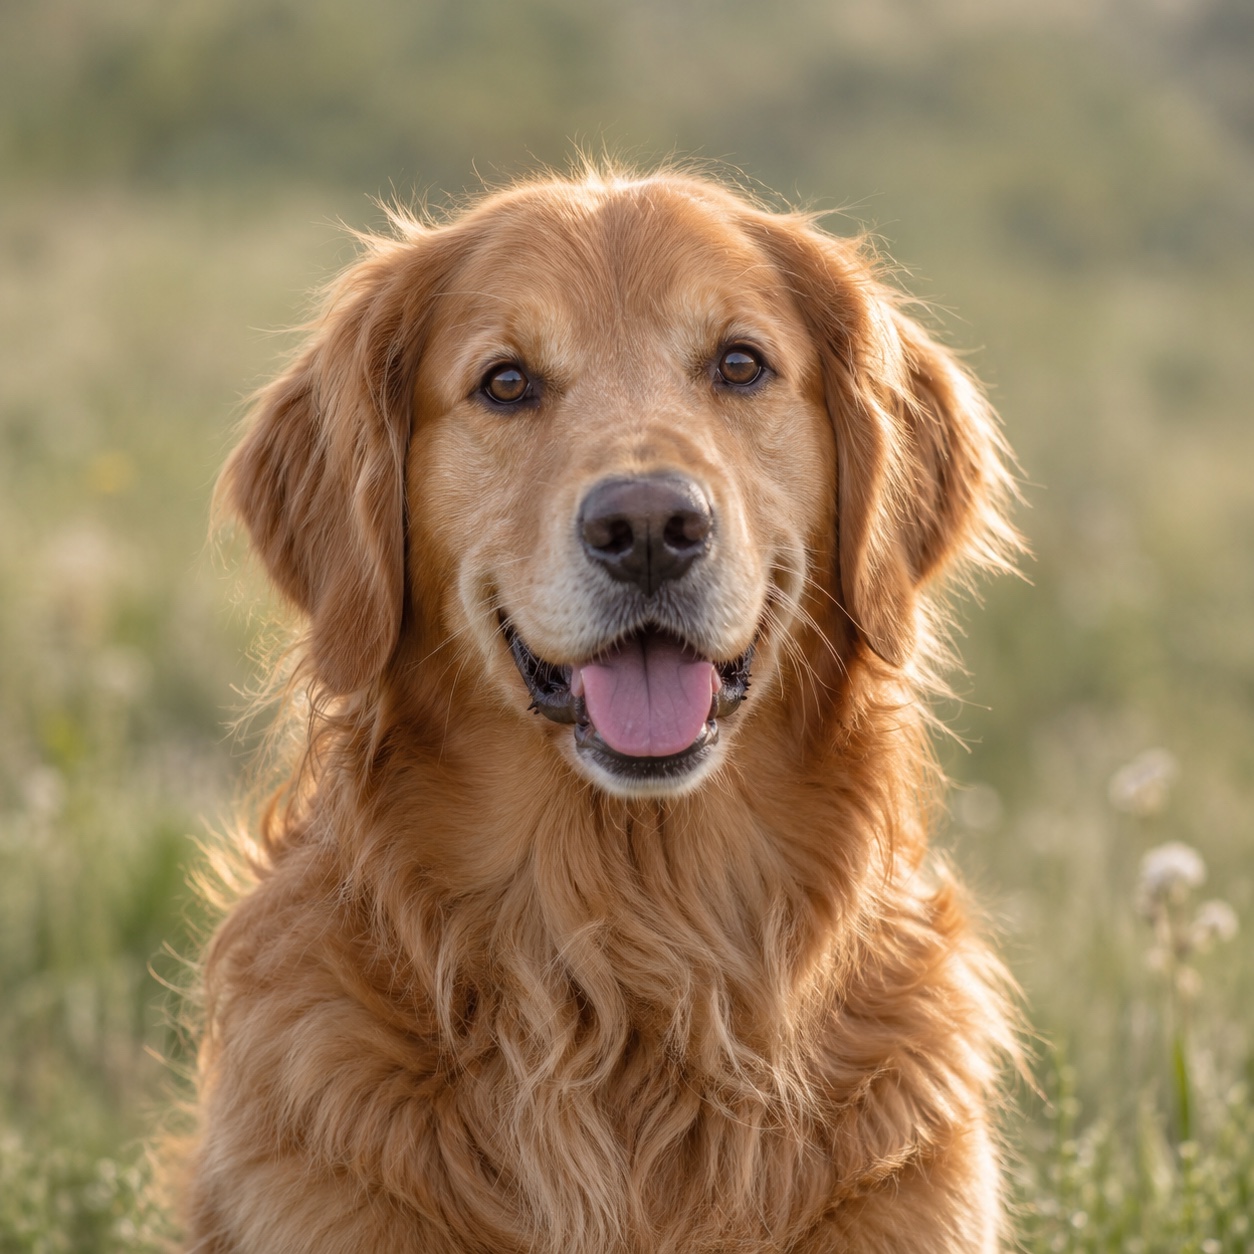
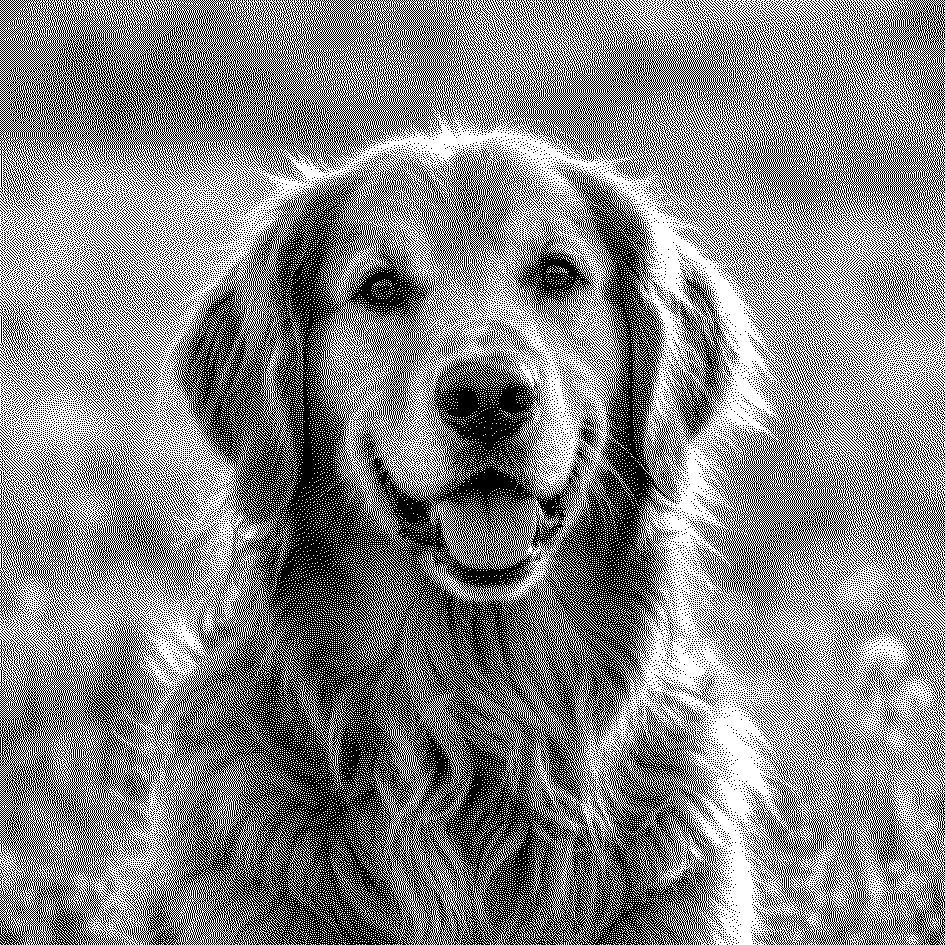
These are digital examples, not photographs of customer engravings. Try the pet example in the editor and compare the output at your chosen size.
Try a verified 100 mm sample PNG
Download the prepared sample PNG (1181 × 1181 pixels). This is an original synthetic portrait prepared by RasterGo, not a customer photo or a photograph of an engraving.
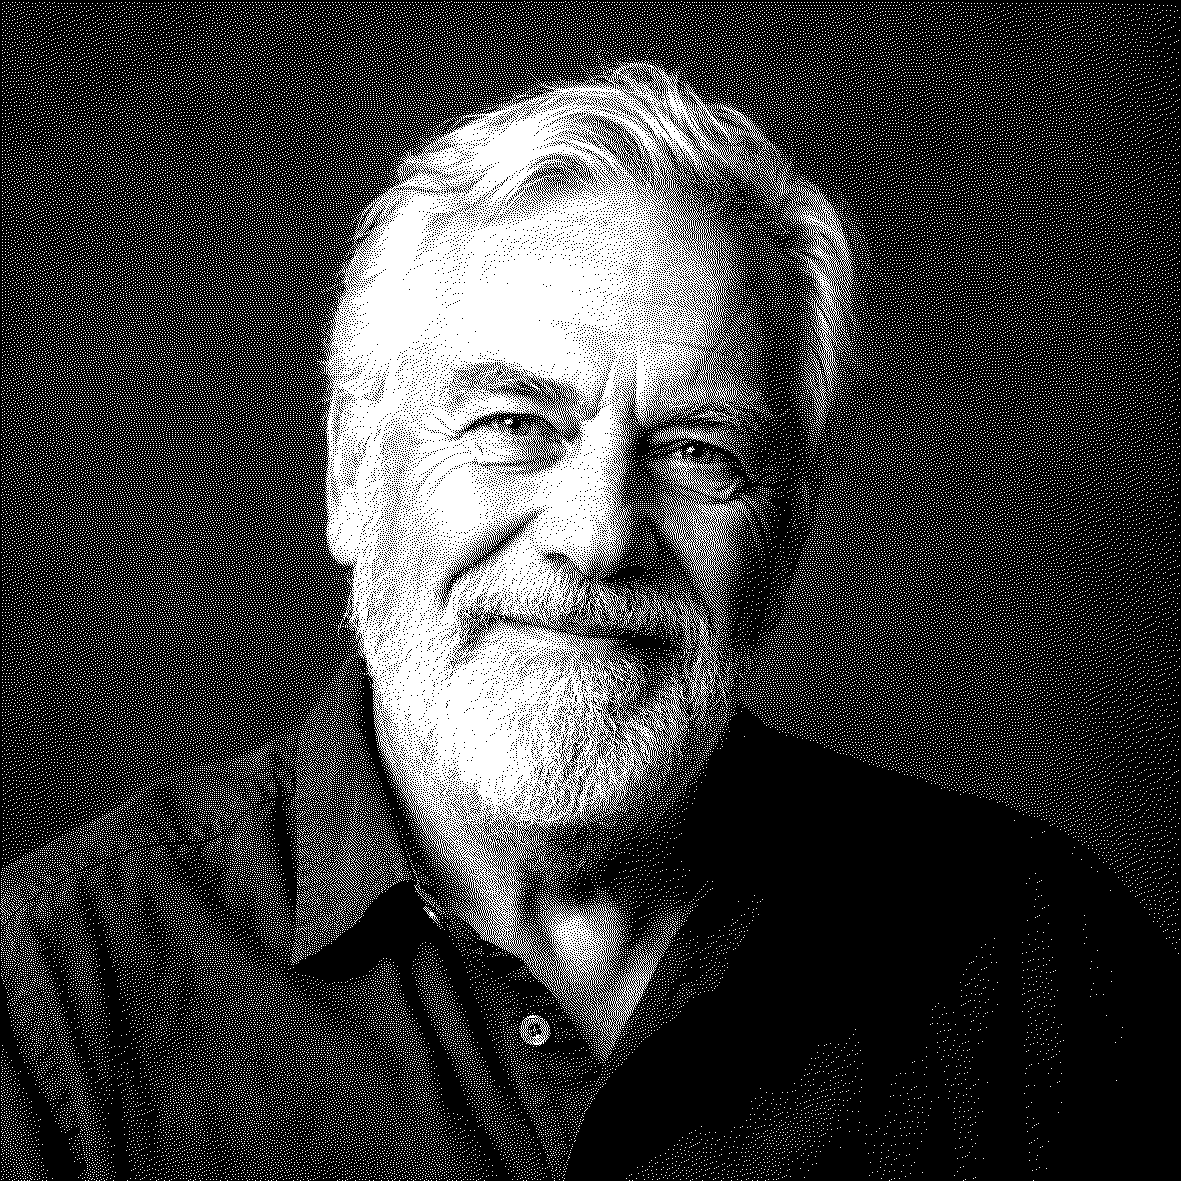
To reproduce it: choose the Portrait example, keep Wood, 100 mm width, 300 DPI, original proportions, automatic contrast, sharpening 25 and Floyd–Steinberg dithering. Click Prepare PNG beside the preview, then Download PNG.
We checked the exported file on 8 October 2026: its PNG pHYs record is 11811 pixels per metre (approximately 300 DPI). Rounding gives an actual digital width of 99.99 mm; confirm the intended dimensions on import. The file proves the digital output only; it does not guarantee a physical engraving result.
3. Avoid processing the same dot pattern twice
Dithering represents tones with black-and-white dots. When you export an already dithered PNG, importing it with another dithering operation may change that pattern.
LightBurn's Pass-Through setting is intended for pre-processed images. Its DPI and line interval are tied to image size in that mode. Choose the mode appropriate to your file and check the preview; importing a colour photo is a different workflow from importing a prepared black-and-white image.
4. Check inversion on slate
RasterGo's Slate starting preset inverts the prepared image. Review whether the result matches the marks you expect on your material, and check for another inversion in your laser software. Use a small test piece before preparing a full batch. A digital slate simulation helps compare appearances; it cannot prove the physical result.
5. Export, import, then check
- In RasterGo, choose a photo or example and select your crop.
- Set physical width and DPI; compare tone adjustments and prepared pixels.
- Export the PNG, or use the batch ZIP for multiple photos.
- Import into your laser software. Confirm width and height in millimetres, image mode and inversion.
- Preview the job and run a small material test using settings appropriate to your machine.
Photo preparation runs in your browser. RasterGo prepares image files; machine control, power and speed belong in your laser software.
If the import looks wrong
- The image is the wrong physical size
- Check the software's width and height instead of relying only on PNG metadata. Set the intended dimensions and recheck the preview.
- The dots look different after import
- Check whether the import is resampling or dithering an already prepared image. Review the image-mode documentation above.
- The result looks inverted
- Check both the export preset and the laser application's negative-image setting. Make one change at a time and test a small sample.
- Small details disappear
- Start with a clearer source, crop closer or simplify the background. Enlarging a low-resolution photo does not add original detail.
PUT THE GUIDE TO WORK
Your photo. Your dimensions.
Try a real export with your own image or one of the built-in examples. No account needed.
Open the free photo editor →